CRM 101 — your first day
Everything you need to get going, in order. Do the four "Get set up" steps once, then the rest is how you'll work day to day. This is the short version on purpose — when you want the deep detail on any page, the full user guide has it.
Bookmark morris-crm-app.pages.dev, sign in with your @morristait.com Google account, add it to your home screen, turn on notifications, and you're ready. The rest of this page shows you each piece.
1. Sign in #
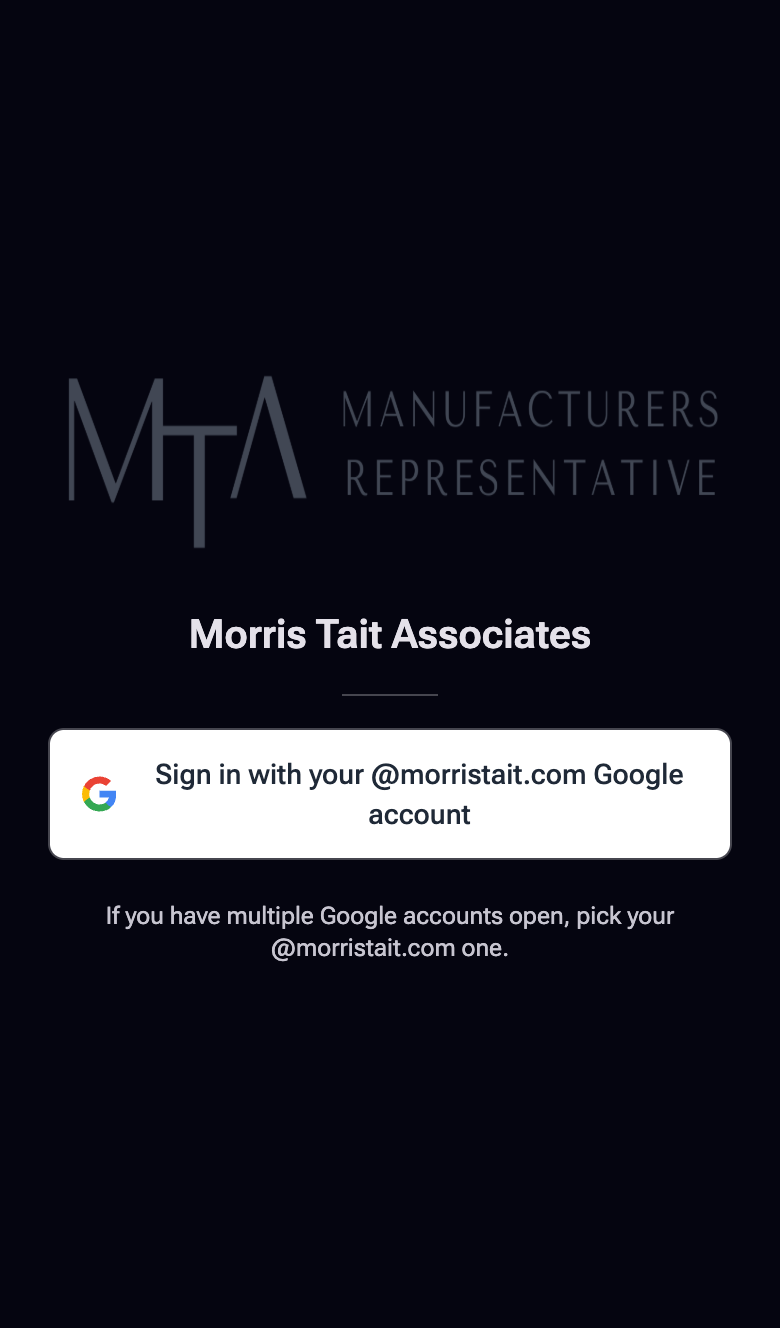
Go to morris-crm-app.pages.dev and bookmark it. There's no separate CRM password — you sign in with the Google account on your @morristait.com email.
- Open the link above in your browser.
- Tap "Sign in with your @morristait.com Google account."
- Pick your work Google account in the chooser.
- You're in — the app opens to Home.
The first time, Google may warn "Google hasn't verified this app." That's expected — we're a private 8-person app, not a public one. Tap Advanced → Continue to MTA CRM. You'll only see it once per browser.
If you have a personal Gmail signed in too, the chooser shows both — pick the @morristait.com one. If you pick the wrong one, the app signs you back out; just try again with the work account.
Sign out anytime from More → Settings → Sign out. Locked out of your work Google account? Message Kevin.
2. Install it on your device #
The CRM runs in your browser, but you should add it to your home screen / dock so it opens like a real app — full screen, one tap, and (on phones) so notifications work. Do this on every device you'll use it on.
| Device | How to install |
|---|---|
| iPhone / iPad | Open the site in Safari → tap the Share icon (box with an up-arrow) → Add to Home Screen → Add. |
| Android | Open the site in Chrome → tap the ⋮ menu → Install app (or Add to Home Screen) → Install. |
| Mac | Safari: File → Add to Dock. Chrome: the Install icon (▾ / monitor) in the address bar, or ⋮ → Cast, Save, and Share → Install. |
| Windows PC | Chrome / Edge: the Install icon in the address bar, or ⋮ menu → Install MTA CRM. |
Once installed you'll see the MTA monogram icon on your home screen / dock. Open it from there from now on.
On iPhone/iPad, push notifications only work after you've added the app to your home screen and opened it from that icon. If you skip this step, the notification toggle in Settings won't be able to turn on. So: install first, then do step 3.
3. Turn on notifications #
Notifications let the CRM reach you — task assignments, @-mentions, and replies — even when the app is closed. Turn them on once per device.
- Open the CRM from your home-screen icon (not just a browser tab, on phones).
- Go to More → Settings → Push Notifications.
- Tap On.
- Your browser/phone asks for permission — tap Allow.
- Tap Send Test Notification. Within a few seconds you should get a buzz/banner and see "Test Sent ✓ — Check Your Phone."
- Repeat on each device (phone and laptop) — each one enrolls separately.
On Mac/Windows, allowing notifications for the site is only half of it — the operating system controls whether the browser can show banners at all.
- Mac: System Settings → Notifications → your browser (e.g. Chrome) → Allow. Make sure a Focus / Do Not Disturb isn't on.
- Windows: Settings → System → Notifications → make sure your browser is allowed, and Focus assist is off.
Test sends but never arrives on a laptop? Fully quit and reopen the browser (not just the window) and test again. Still nothing — tell Kevin.
The recurring digests (overdue tasks, accounts going quiet) are intentionally paused while everyone settles in, so you won't get buried week one. They'll switch on gradually. You'll still get the important real-time pings (assignments, @-mentions).
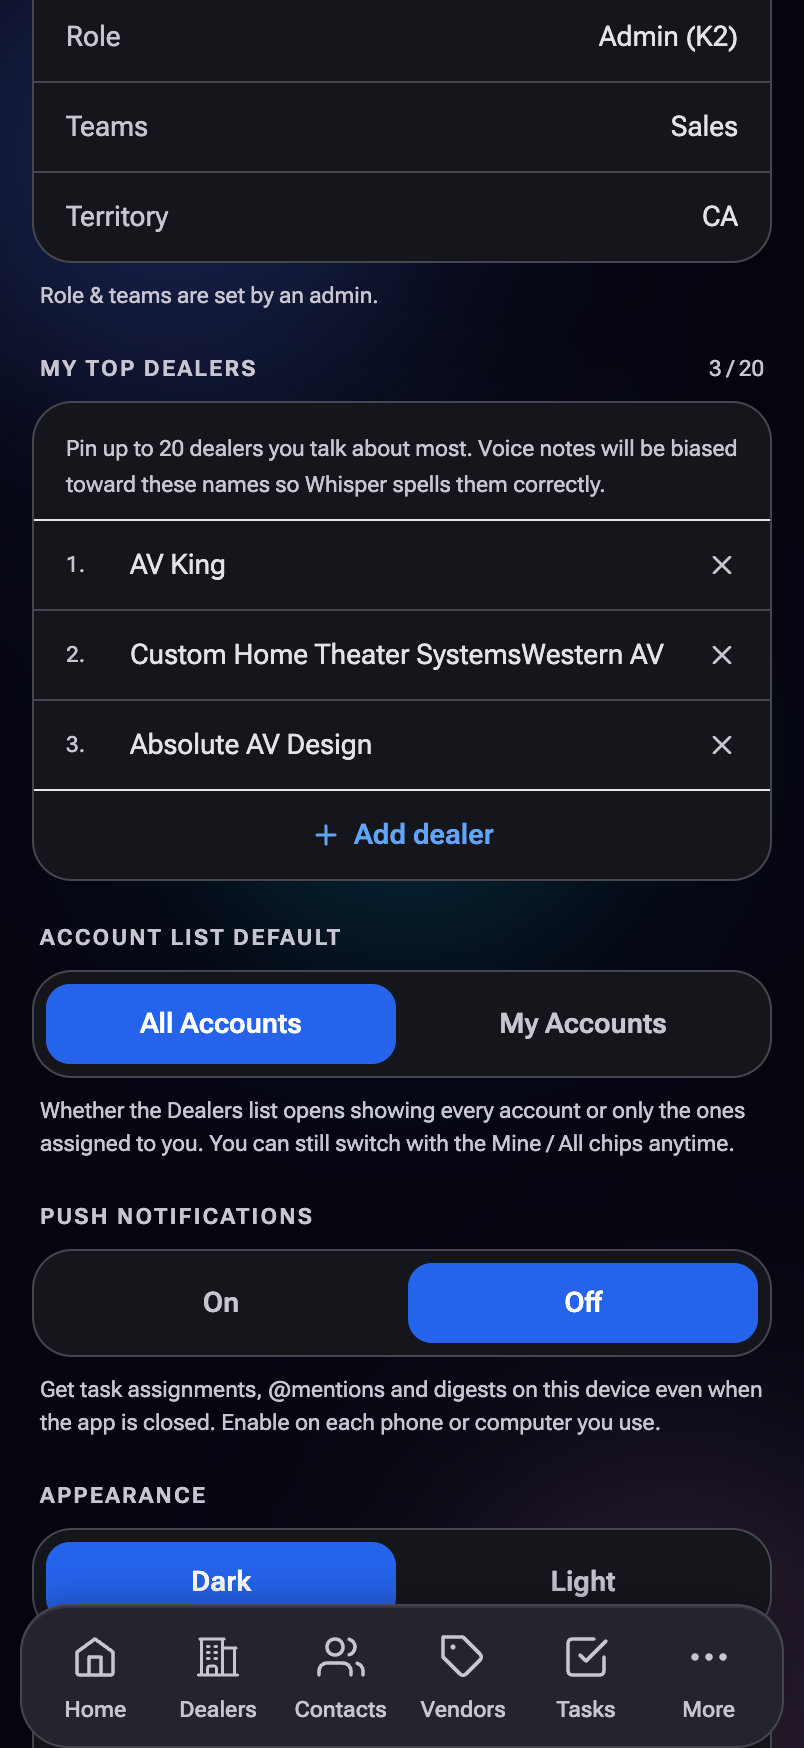
4. Make it yours #
Two quick settings make the app feel like yours from day one. Both live in More → Settings.
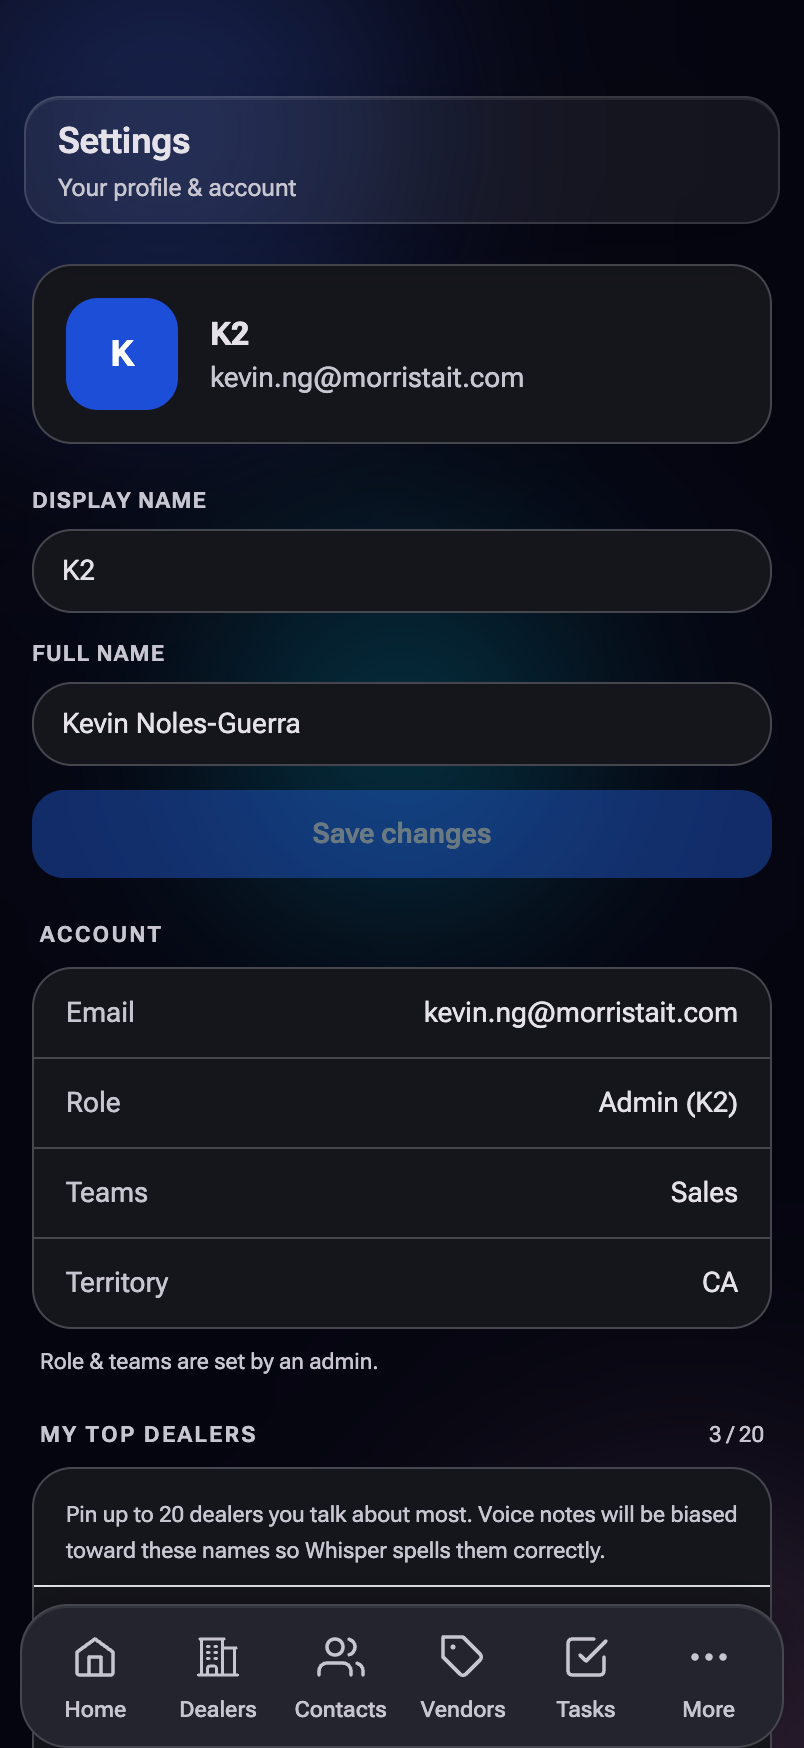
Pin your top dealers
In Settings → My Top Dealers, tap Add dealer and pin the accounts you talk about most (up to 20). This biases the voice-note AI toward those names so it spells them right when you dictate. Remove one anytime with the ✕ next to it.
Choose your default view: All vs Mine
The Dealers and Contacts lists have an All / Mine toggle next to the search bar — All shows every account, Mine shows just the ones assigned to you. You can flip it anytime.
To set which one a list opens to by default, go to Settings → Account List Default and pick All Accounts or My Accounts. Most reps set this to My Accounts so the list opens focused on their book.
5. The nav — your pages at a glance #
On a phone, the main pages live in the bottom bar; everything else is under More. On a laptop, the same pages sit in a left rail (with a few extras shown directly). Here's what each one is for:
| Page | What it's for |
|---|---|
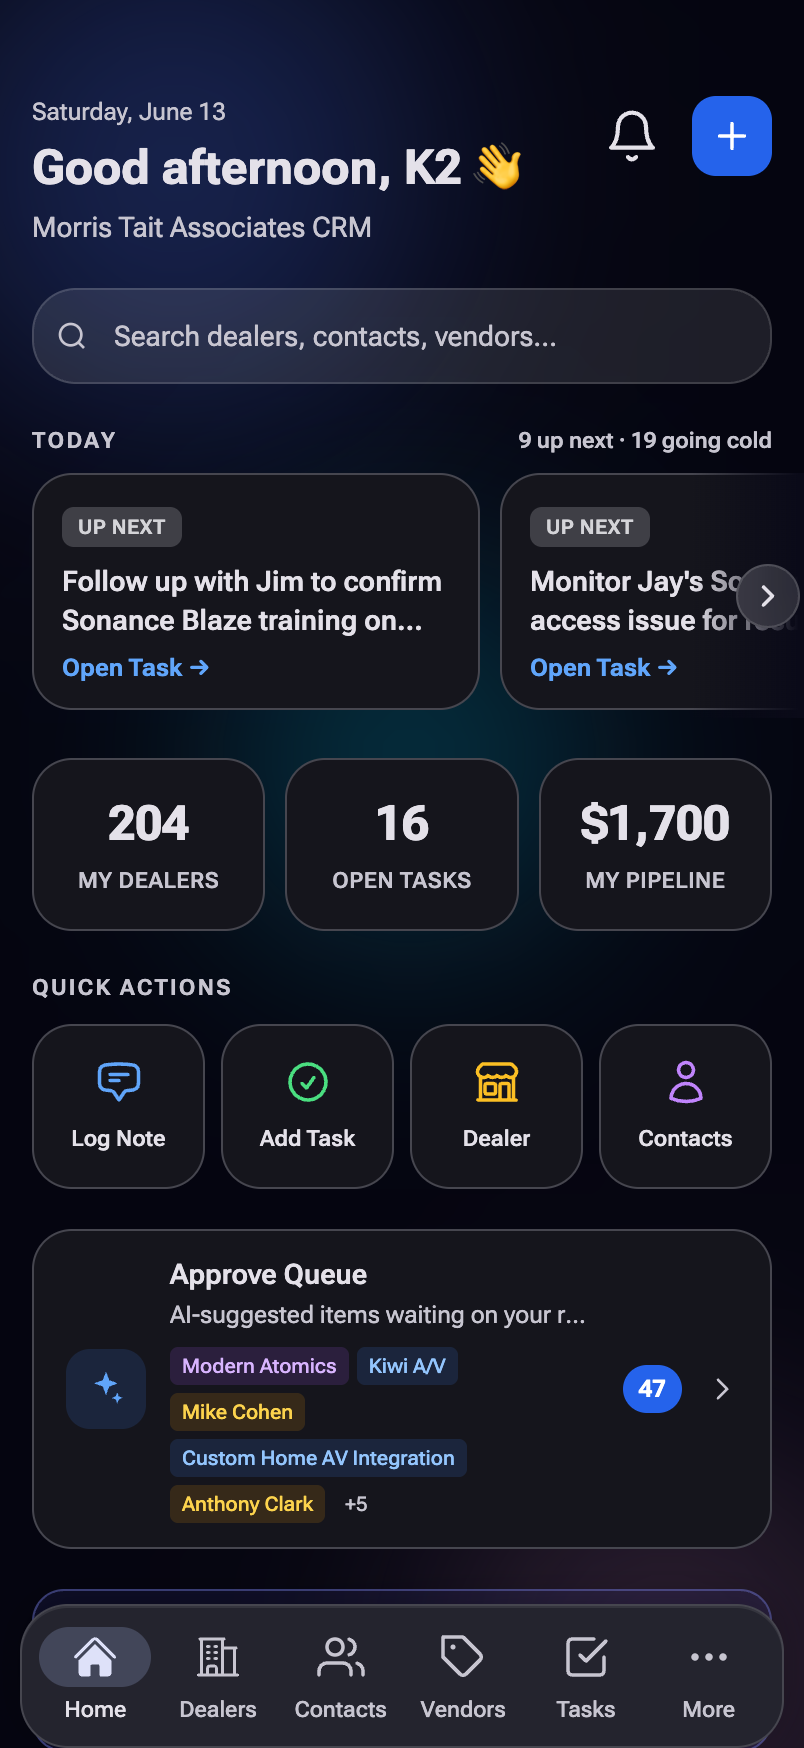
| Home | Your launchpad — today's tasks, accounts going quiet, recent activity, quick actions. |
| Dealers | Every account. Search, filter, open a dealer to see its full record. |
| Contacts | The people — at dealers, vendors, and industry. Search and open anyone. |
| Vendors | The brands we rep and the ecosystem brands around them. |
| Tasks | The shared to-do list — yours, ones you created, and the team's. |
| More | The hub for everything below + Settings and Sign out. |
Under More (or the desktop left rail) you'll also find:
| Notifications | Your bell — assignments, @-mentions, updates. (See §10.) |
| Activity | The live feed of every note, call, email, and visit logged. |
| Approve | The review queue for AI-suggested items and things needing a confirm. |
| Voice Notes | Your recorded/typed notes and their status. |
| Pipeline | Sales opportunities by stage. |
| Feedback & Roadmap | Send ideas/bugs and see what's being built. (See §11.) |
| Team | The MTA roster (read-only). |
For Monday we're focusing on notes, tasks, dealers & contacts, notifications, and feedback — the sections below. The other pages are there when you're ready; the full guide covers them in depth.
6. Voice notes + the 5 callouts #
Voice notes are the heart of the CRM. Talk through a visit or a call, and the AI writes it up and pulls out the action items for you.
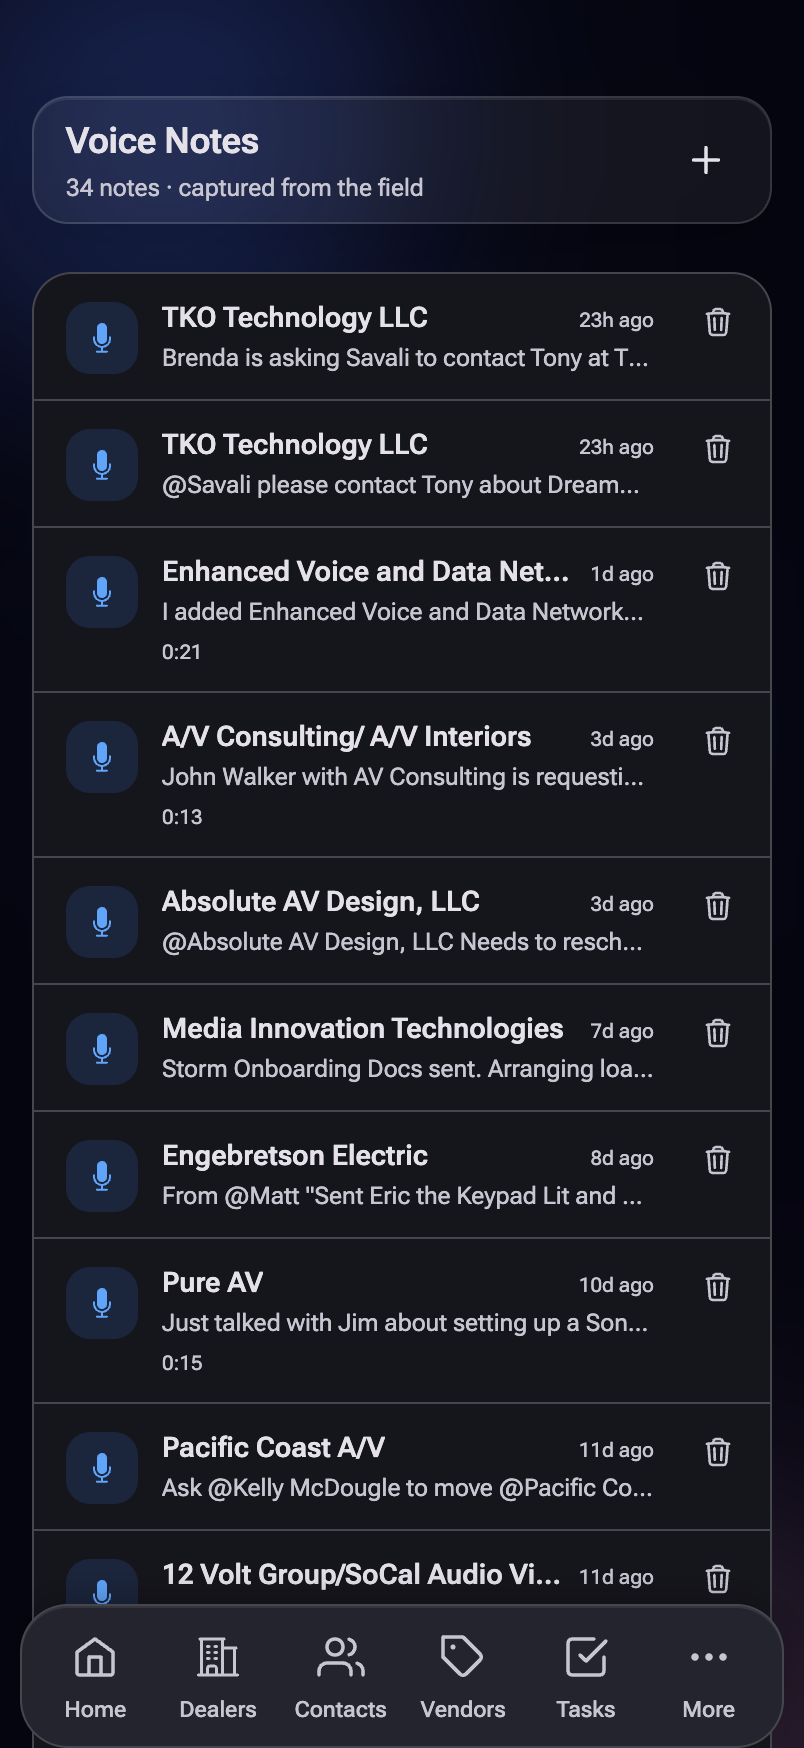
Recording a note
- Tap + Note (on Home or the Voice Notes page) → choose Voice Note.
- Set the About bar at the top — who's this about? Link a dealer/contact/vendor, or leave it and let the AI figure it out from what you say.
- Tap the mic to record. Tap it again to pause (and again to resume) — a stray tap pauses, it doesn't end your take.
- When you're done, tap "✨ Done — Transcribe Note."
- The AI transcribes and analyzes, then shows you the write-up plus any callouts it found. Review and approve.
Start with the dealer/contact name ("At Absolute AV with John today…"). It helps the AI link the note to the right account, and pinning your top dealers helps it spell names correctly.
The 5 split callouts
From one note, the AI can pull out up to five kinds of follow-up. Each shows as its own colored box with a keep/drop toggle — leave it checked and it gets created when you approve; uncheck it and the text stays in the note but nothing else happens.
You only see a callout when the AI actually detected it — a quick call might have just one task; a big ride-along day might have all five.
7. Typed notes #
Not a good moment to talk? Type the note instead — you get the same AI analysis and the same five callouts, just without recording.
- Tap + Note → choose Typed Note.
- Type what happened.
- Tap "✨ Send to Analyze." The AI reads it and surfaces the callouts (pipeline, tasks, objection, etc.).
- Keep or drop each callout, then tap Approve.
They're instant (no transcription wait), they don't use voice credits, and you review your own — typed notes don't go to the office queue. Great for a quick "left a voicemail" or a tidy recap you'd rather write than say.
8. Tasks — assign, review, complete #
Tasks are the shared to-do list. You can make one for yourself, hand one to a teammate, or let a voice note create them for you.
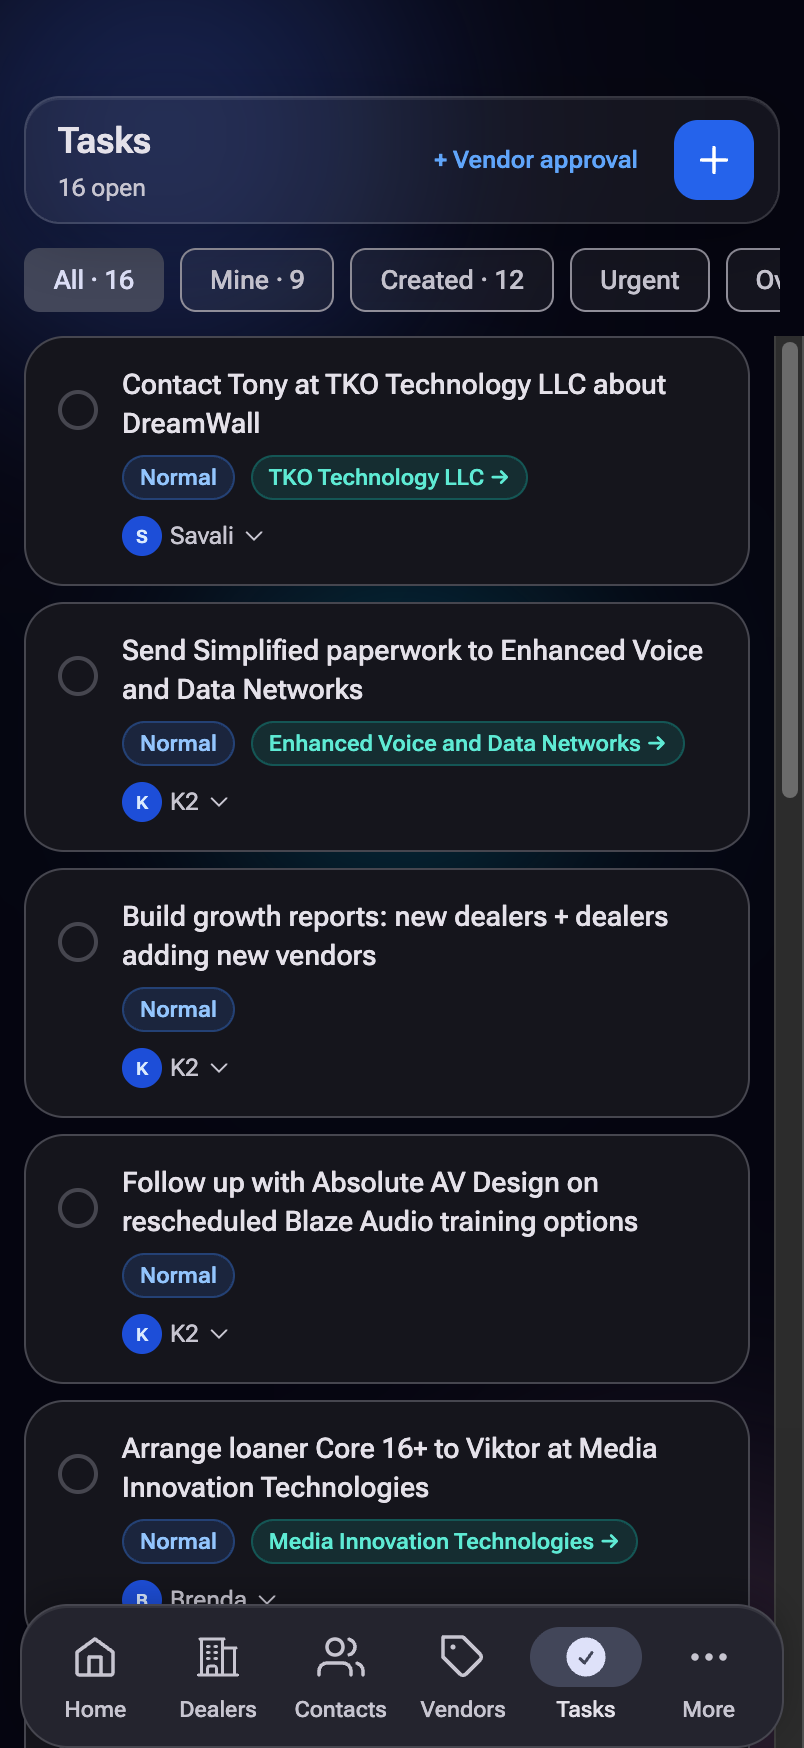
Create & assign a task
- Go to Tasks → tap + Add.
- Type the Title (what needs doing).
- Set Assign To (who owns it) and, if needed, Also Notify (others to keep in the loop).
- Pick the Urgency — Low, Normal, High, or Urgent.
- Optionally link it to a dealer or contact so it shows on that record.
- Tap "✨ Send to Analyze" to let the AI auto-fill the assignee/link from your title, or just fill it in yourself. Then Create.
Type @ and a teammate's name in the title and the task auto-assigns to them. Tasks created from a voice note's ✓ callout come pre-linked to that account.
Review your tasks
On the Tasks page, use the filter chips to focus: Mine, Created (ones you handed out), Overdue, Urgent, Done, or All. Each task shows a status:
Complete a task
Open the task and tap Mark Complete. That's the one way a task becomes Done — so a tap can't accidentally close something out.
9. Dealers & Contacts #
These two work the same way, so once you know one you know both.
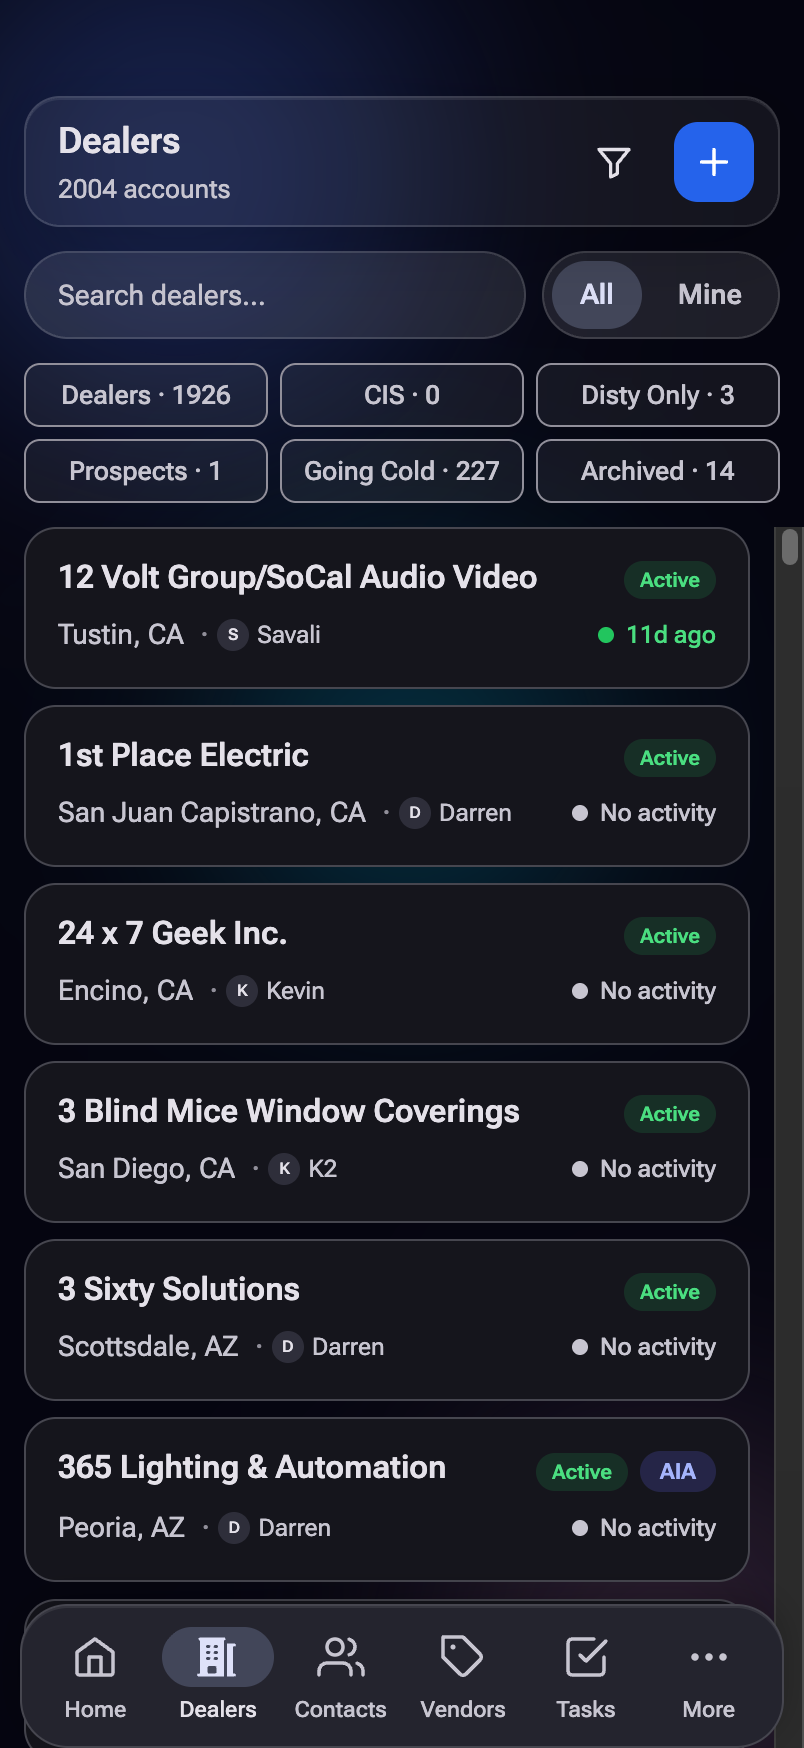
- Search — type a name, city, or DBA at the top. Search is usually faster than scrolling.
- All / Mine — the toggle by the search bar flips between everyone's accounts and just yours (set the default in Settings).
- Quick-filter tabs — tap a tab (Dealers, Prospect, Going Cold, etc.) to narrow the list; each shows a live count for your current All/Mine view.
- Funnel filter — the funnel button filters by Rep and by Brands (a dealer must carry every brand you pick).
- Open a record — tap any row to open its detail page, with tabs for Overview, Activity, Contacts/Vendors, Tasks, Notes, and more.
Each row has a little activity dot: green is recent, amber is getting stale, red means it's been a while. It's a quick read on which accounts need a touch.
10. Notifications — reading & navigating #
Your notifications are the in-app version of the pushes from step 3 — everything aimed at you, in one list.
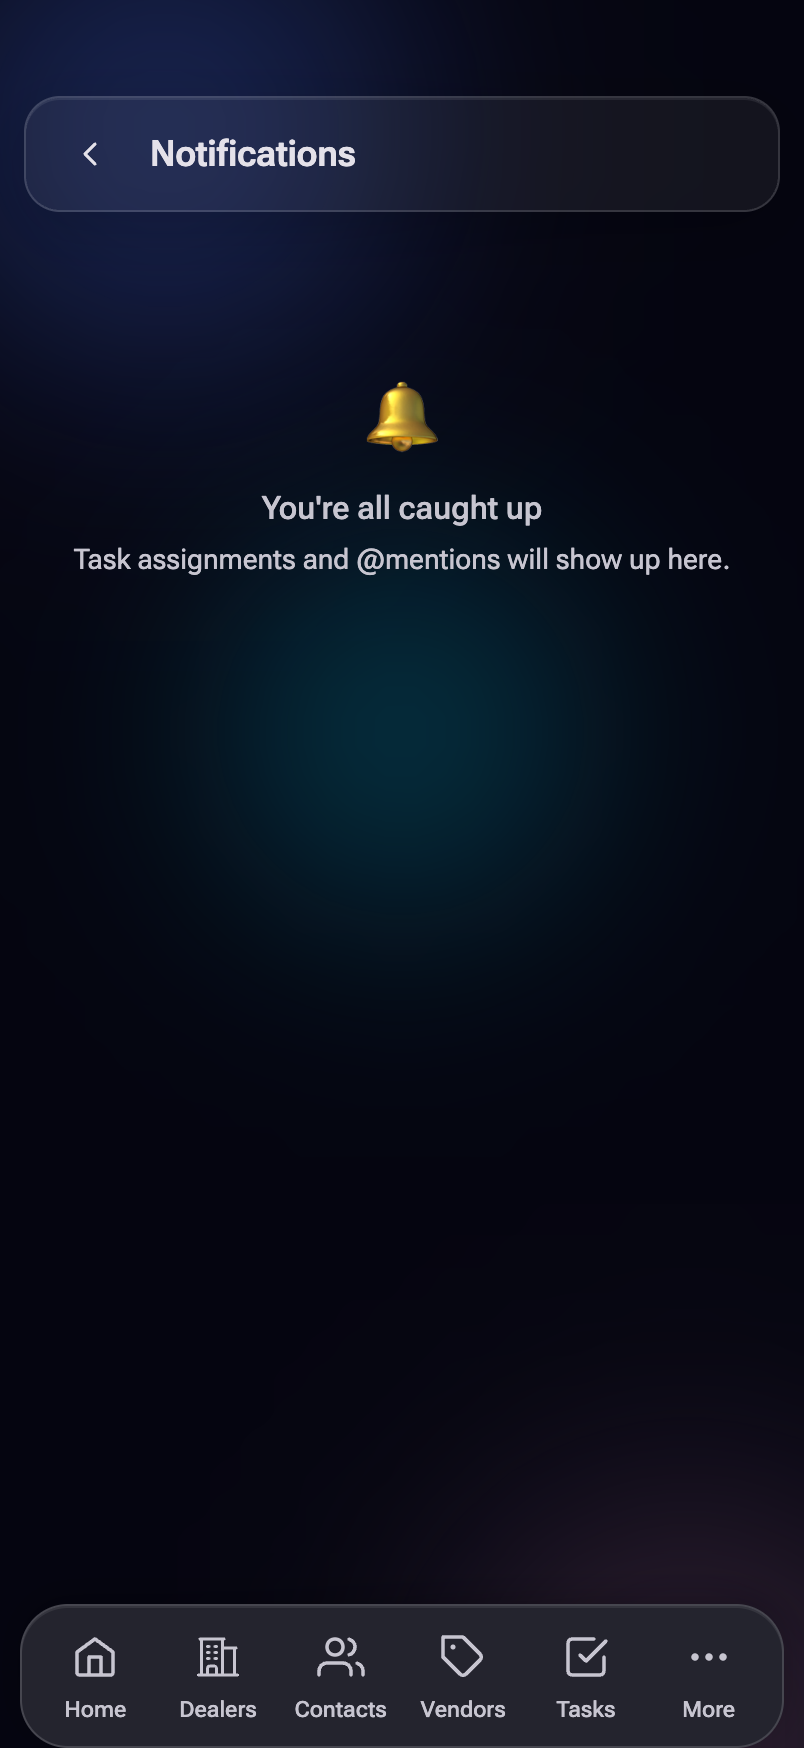
- Get to it: tap the bell (desktop left rail) or open it from More on mobile — a badge shows your unread count.
- Tap a notification to mark it read and jump straight to whatever it's about — the task opens, the dealer page loads, etc.
- Mark all read clears the unread dots; Clear all empties the list.
- "What's New" announcements pin to the top so you don't miss a release.
11. Feedback & reporting bugs #
This is the most important page during the beta. If something's broken, confusing, or missing — tell us here. It goes straight to Kevin, and you can see it get worked on.
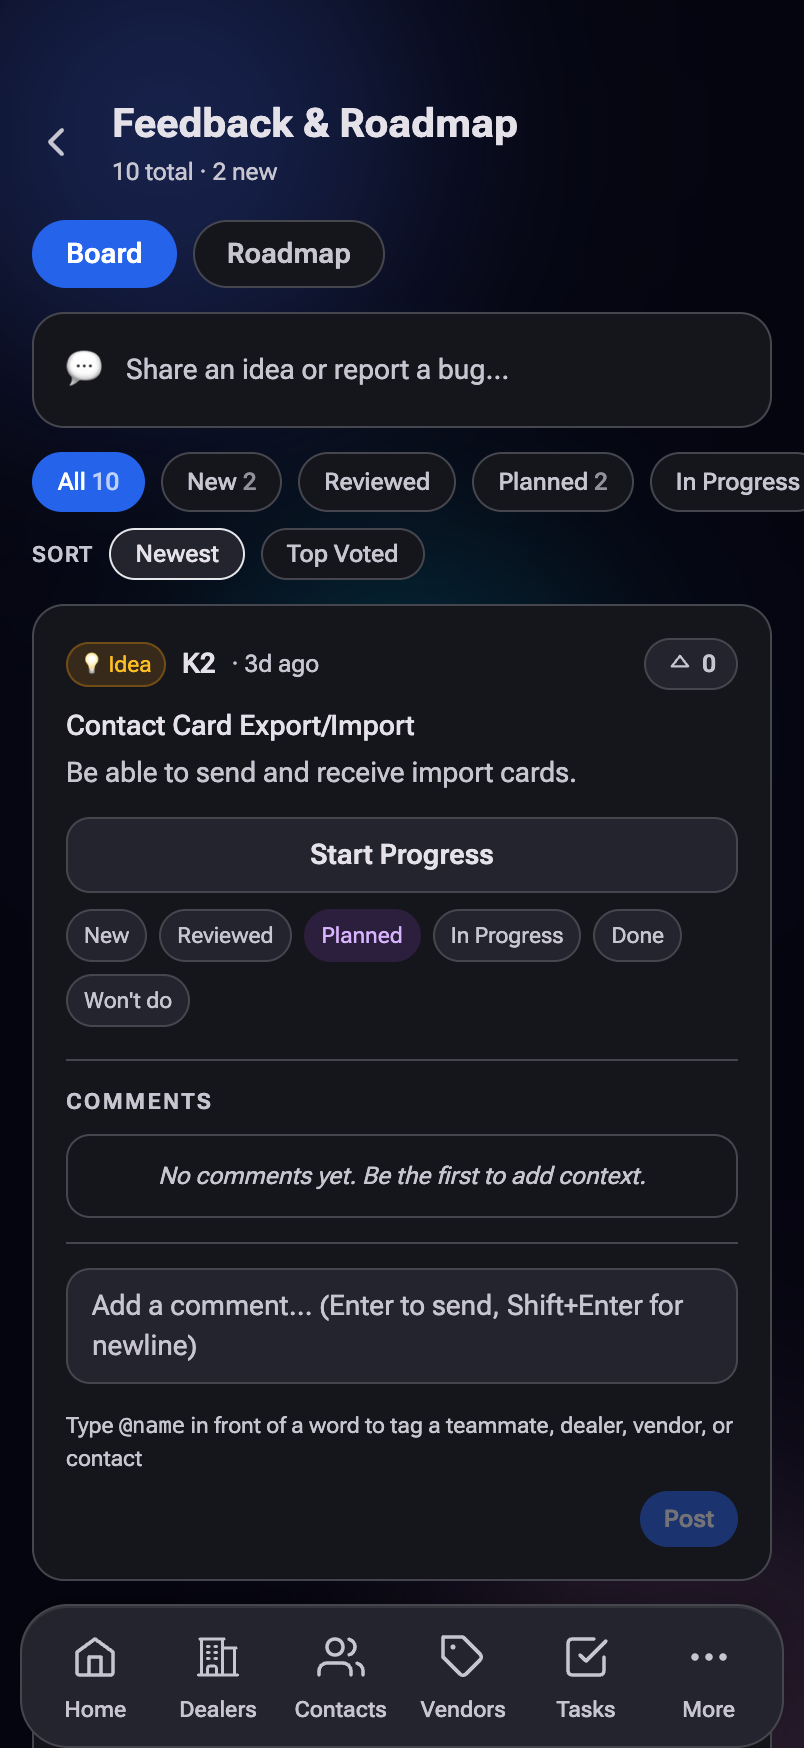
- Go to More → Feedback & Roadmap.
- In the composer at the top, pick what it is — Bug Report, Feature Request, or Other.
- Give it a short title and a description (what you expected vs. what happened, for bugs).
- Tap Send.
Upvote anyone else's idea with the ▲ button — the count genuinely helps decide what gets built next. The Roadmap tab shows what's In Progress, Up Next, and Completed, so you can watch your suggestions move.
Don't sit on anything. A 10-second "this button did nothing" is exactly what helps most right now — small reports early make the app better fast.
Once you're comfortable, the full user guide walks through every page in detail — Pipeline, Distribution, the Approve queue, vendor records, status badges, and more. No rush. Get these basics into your hands first.